
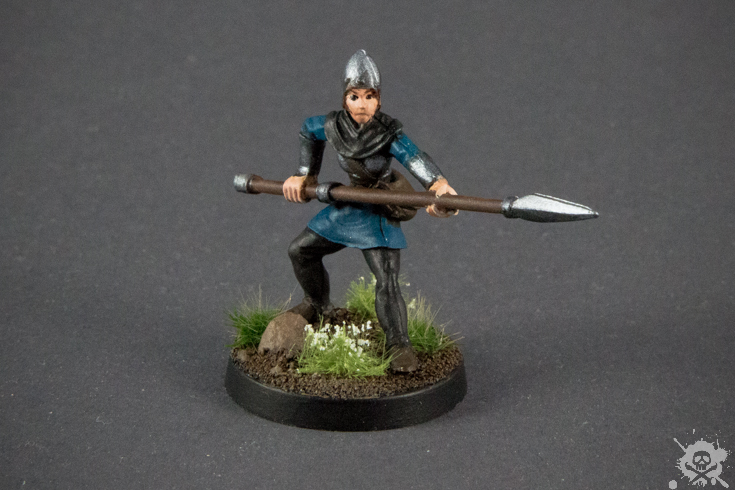
Spearwoman (06126A)
The first miniature of a human on this blog was painted by my fiancé, while I was painting orcs next to her. For her very first miniature, she chose an old Reaper mini: The woman from mercenary spearmen (06126).
The miniature is rather old, and I found no pictures of other people’s paint jobs. But it’s a very good miniature for getting started with the hobby: It’s simple, with no hair to paint, no complicated armor pieces or ornaments. At the end, it turned out way better than the first five of my minis back in the day. I’m a little jealous 😛
I used a new photo setup to take pictures for this miniature. In November, I tried to take pictures of some kobolds (I’ll post them next week), but failed terribly. As I primarily used natural light from a window, it was too dark for my camera even 10am in the moring. When I took pictures of the undead miniatures back in October, it was still brighter outside. So, I recently bought a small lightbox for 30 euros and could borrow some photo lamps and a Canon EOS 600D with an EF24-104mm object lens from work. The pictures in this post were all taken with this new setup.
Basing and Priming
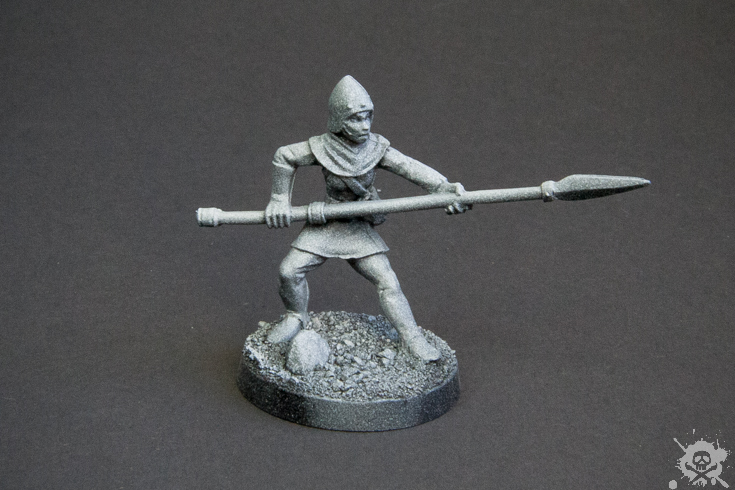
The spearwoman is from Reaper’s Warlord 25mm heroic scale line. After cleaning and removing mold lines, we glued it onto a 25mm plastic base and added some small sand and pebbles. After a lot of reading on the internets and watching tutorials on youtube, I changed my priming method last month. After black priming (still using Vallejo Black Primer via Airbrush) I sprayed white primer from 45 degrees above the miniature from aprox. 50cm distance from all angles. This pre-shading adds lots of contrast, which comes in handy while painting later. If the paint is diluted enough, some painters even the pre-shading technique to let shadows and highlights shine through the basecoat. The “dusting” with the white primer leaves a rough surface on the miniature, which is a good thing. Paint better adheres to this surface and the figure is easier to paint. You can see the result of the priming in the pictures:

Painting
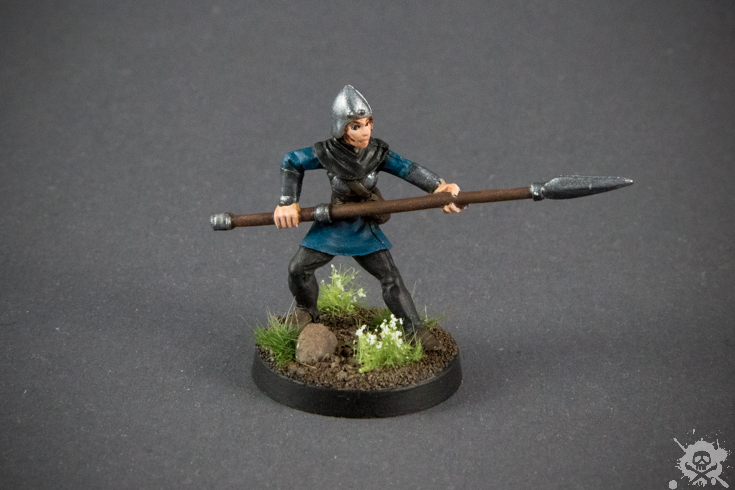
I haven’t paying attention to color theory or color schemes for miniatures until now. I just read a couple of articles on different primary and secondary two color/three color complements and will incorporate that in my next paint jobs. For her spearwoman, my fiancé wanted turquoise and black as primary colors. Now I know, that there should be something orange or yellow to complement turquoise. Well, it has some brown on the base at least 😉
The cloth parts were painted with Vallejo Model Color (VMC) Turquoise and VMC Dark Grey, the skin with Vallejo Game Color (VGC) Pale Flash. The skin later received a wash of Vallejo Game Ink (VGI) Flesh, the cloth received a wash of VGI Black. The metal breastplate and helmet were painted with VMC Gunbolt Metal and highlighted with VMC Silver. For the spear, VGC Leather Brown was used and washed with VGI Brown and Black. The eyes were really hard to do, as we both haven’t painted human eyes ever before. I think, they turned out okay.
The base was first painted with VMC Chocolate Brown, then washed with VGI Brown, then drybrushed with VMC Chocolate Brown, VMC Flat Earth, VMC Dark Sand and finally VMC Buff.
Finishing Touches
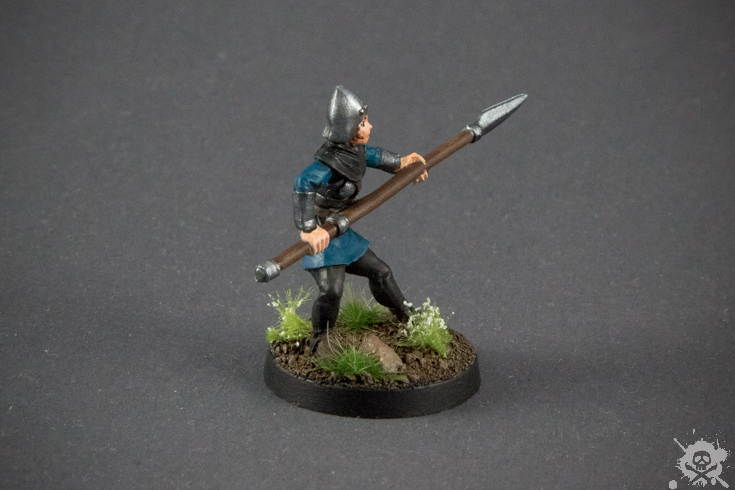
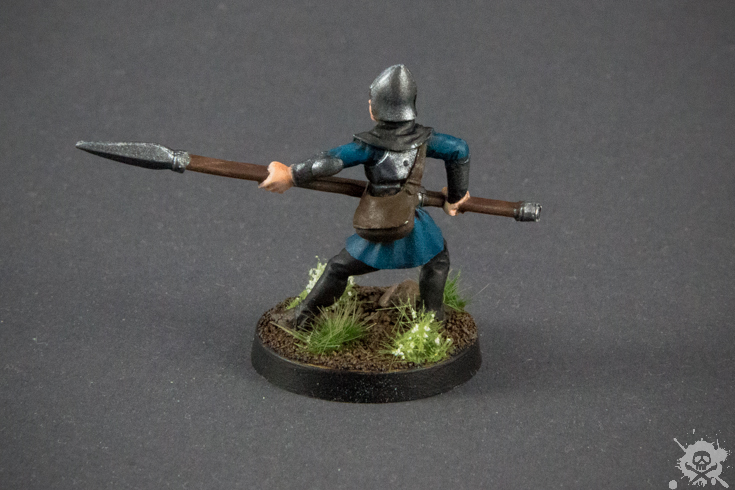
The figure was sealed with Army Painter Anti-Shine Varnish.We decorated the base with lush green tufts of gras and white meadow flowers to contrast the base from the miniature. And that’s it. What do you think? Do you like it?
I wish my first miniature had turned out this nice. 😉