Warhammer Mech (WHD-8D)
Six months ago, I started the last phase of my dissertation and I haven’t had any time for the hobby. With the diss finished now, I’m back again. Let’s start with the first scifi miniature on this blog: A Warhammer Mech from Iron Wind Metals.
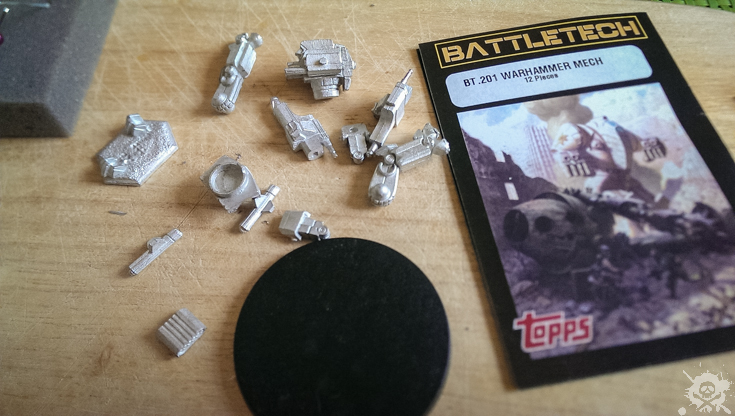
A dear friend and colleague of mine is a huge fan of big robots and battle mechs in general and Battle Tech / Mechwarrior in particular. A year ago, I promised him a painted miniature of his favorite mech as a gift for his next birthday. He decided on the Warhammer WHD mech. Iron Wind Metals has a Battle Tech miniature series with lots of different variants of the iconic mech. I choose the WHD-8D miniature with a Streak SRM-6 missle launcher.
There are lots of cool paint jobs of this miniature. I especially like the one from Psycho at Camo Specs Online with bright colors and the battleworn look. Most painters choose a specific faction/regimental paint scheme for their mechs. Another fine example of a WHM-8D in Davion Guard colors can be found here (by Hyena) or here (by Psycho). There are also nice variations with desert camo by Mastergunz, in blue by Gideon or in red by Cavalier Cavalry Productions.
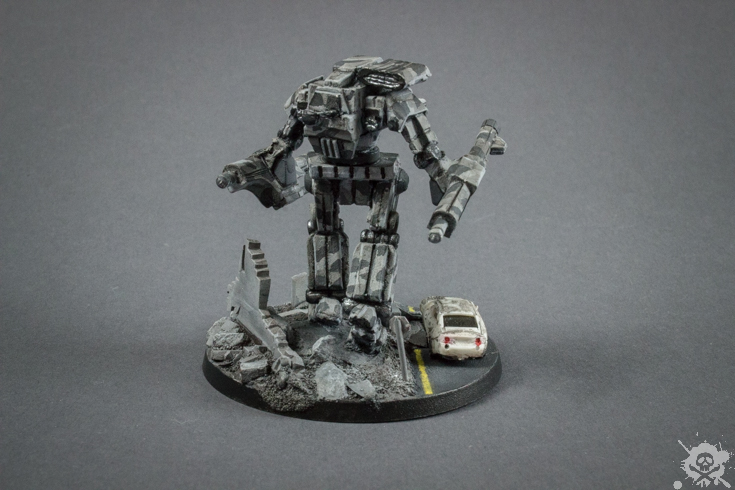
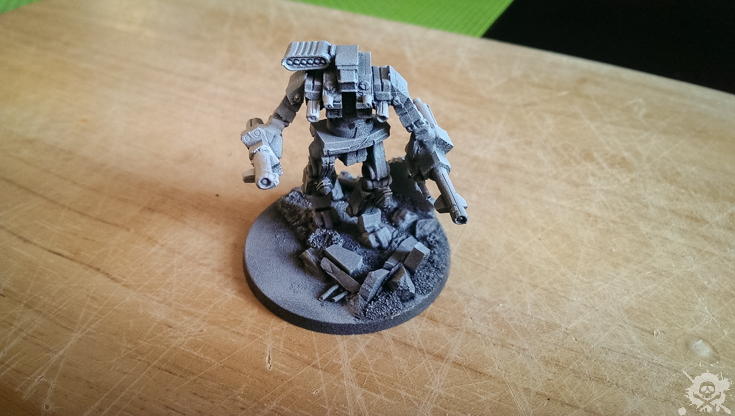
My friend didn’t want any special regiment colors and preferred mechs in a urban scenario with simple urban camo. So the color scheme would be mostly greys. To emphasize the size of the mech (about 15 meters and weighing 70 tons, according to the battle tech wiki) I wanted to create a base with building parts, a car and some traffic signs. As the miniature will just be used for display purposes, a little extra work on the base is warrented. When painting this mini, I remembered to take some pictures during the process with my phone.
Preparation
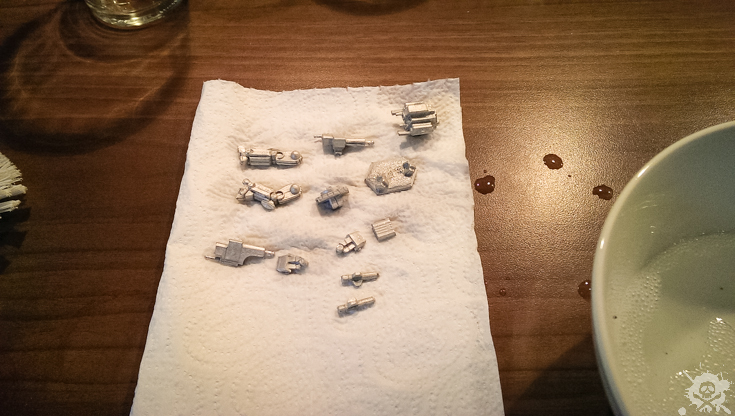
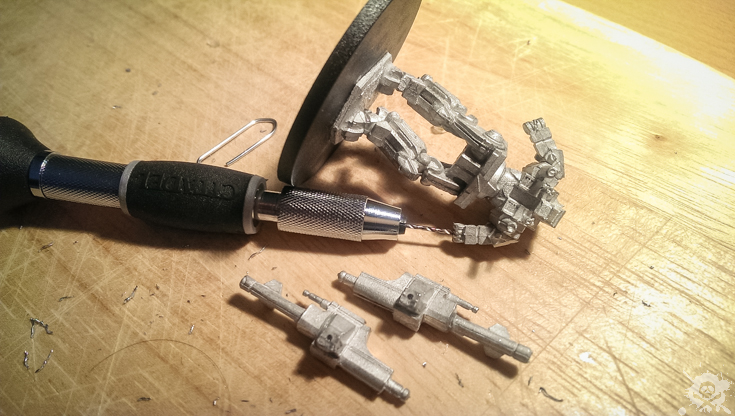
I normally skip this step in my posts, but this miniature required quite some effort compared to the miniatures I usually have which all come in one or two pieces. The mech came in 12 pieces and had to be assembled first. After removing mold lines with a cutter and cleaning the parts with soap, I started to puzzle them together with super glue. The arms were to heavy to hold on the torso by glue alone, so I pinned them with parts of a paper clip.

Basing and Priming
The mech was glued onto a 50mm base to have enough space to create a small urban landscape. I used small rocks, sand and old pieces of plastic (actually parts of bases from the bigger Reaper Bones miniatures that I had cut off and saved for later). I arranged some ruins and a part of a road, where a car would be later. The mech then was primed with Vallejo Black Primer and dusted with white primer via Airbrush.

Painting
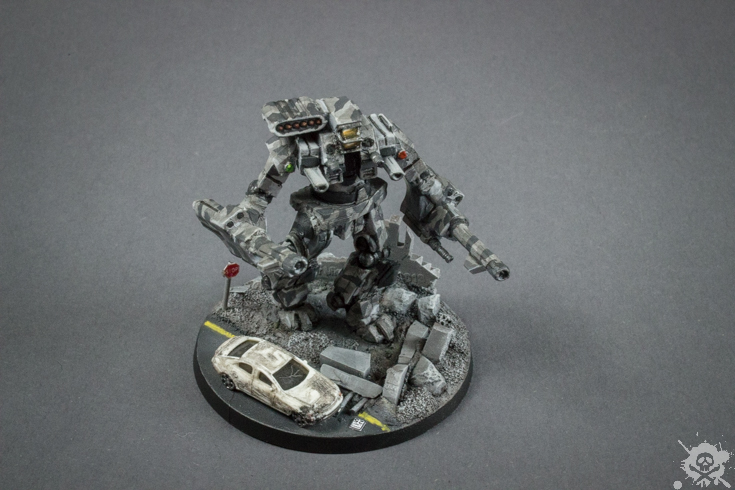
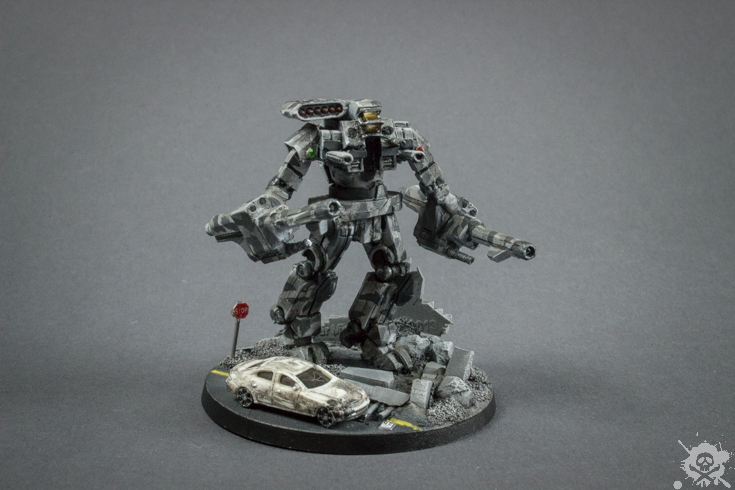
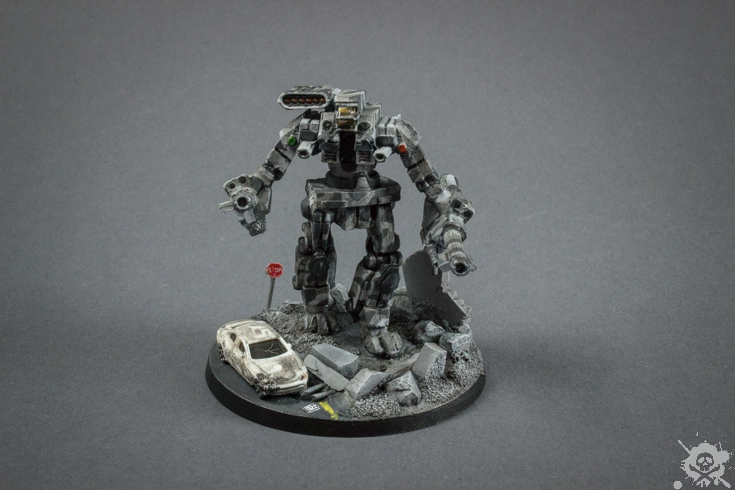
As my friend wanted to have urban camo, I used different shades of grey. First, the plating of the mech was painted in Vallejo Model Color (VMC) Dark Sea Grey. Then I mixed in some VMC German Grey (1:2) and painted small patches of camo, using this image for reference. Next, I mixed in even more VMC German Grey (1:1) and added another, darker pattern. I then applied a wash of Vallejo Game Ink (VGI) Black and touched up messy spots after drying. Next, I painted some details like the missles, a red and green light on the mech’s torso and blacklining joints and dark areas of the mech with black and VMC Gunmetal. Finally, I painted the cockpit. I decided on an orange glass tinting, following a tutorial from Ross Koga.
The ground was also painted in Earth Tones (mix of Vallejo Air Color (VAC) Dark Yellow and VMC German Grey) and drybrushed from grey to VMC Off-White in 4 color steps. The ruin parts were similarily painted with lighter grey tones (VMC Dark Sea Grey and VMC Sky Grey), highlighting the edges. The street was painted black and drybrushed with VMC Dark Sea Grey. Afterwards, I drew a yellow street marking line on the edge of the street.
Finishing Touches
First, the mini was sealed with Army Painter Anti-Shine Varnish. Then I wrote some numbers on the shoulder plating using a Micron pen. For the base, I printed out two sets of street signs (STOP sign and SPEED LIMIT 25 sign) on 200mg paper in a print shop nearby. I glued the STOP sign to another piece of paper clip and drilled a hole in the base to attach it from under the base. For the car, I ordered a small pack of cars in the rail transport modelling scale “Z” (1:220), that fit the scale of the mech perfectly. I painted the car in a demolished look and also fixated it by pinning it with a small piece of paper clip. I glued the SPEED LIMIT 25 sign on the road in front of the car as part of the wrecked scenery.
Overall, the miniature is about 8 cm high. I think the car and the signs emphasize how big the mech is supposed to be, even on the small scale.