Armoured Skeletons I
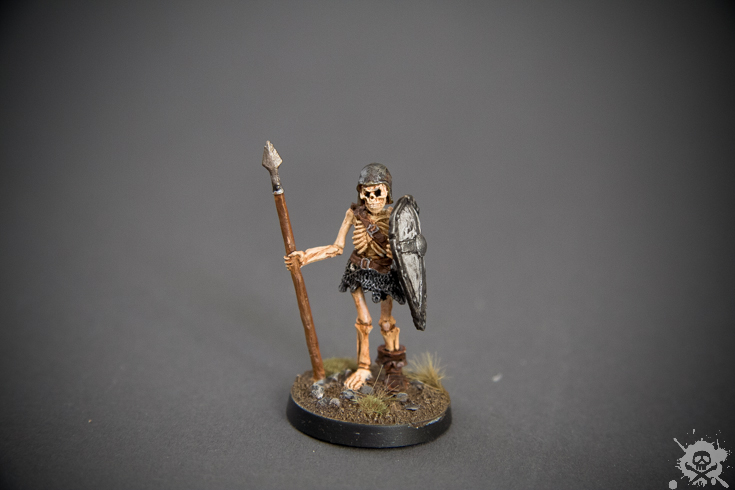
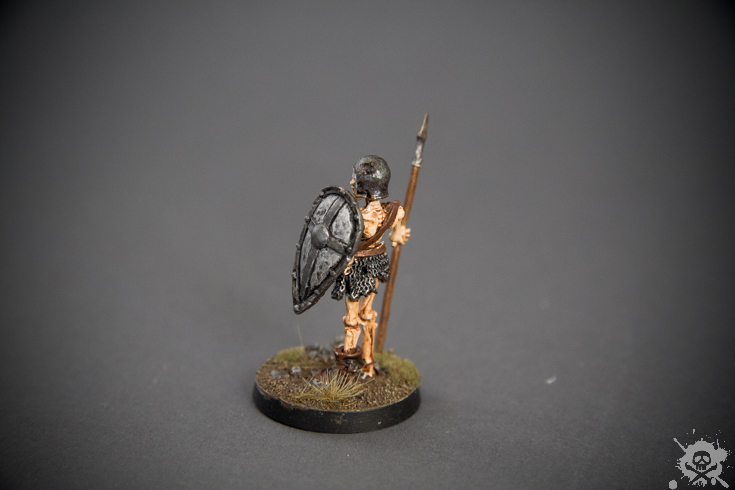
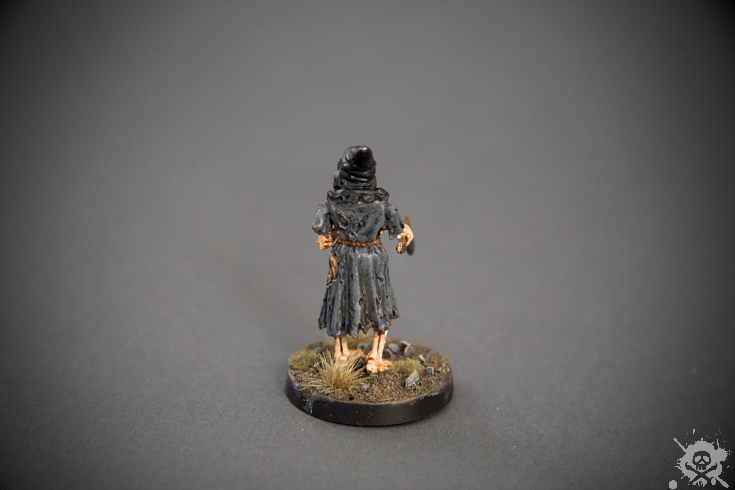
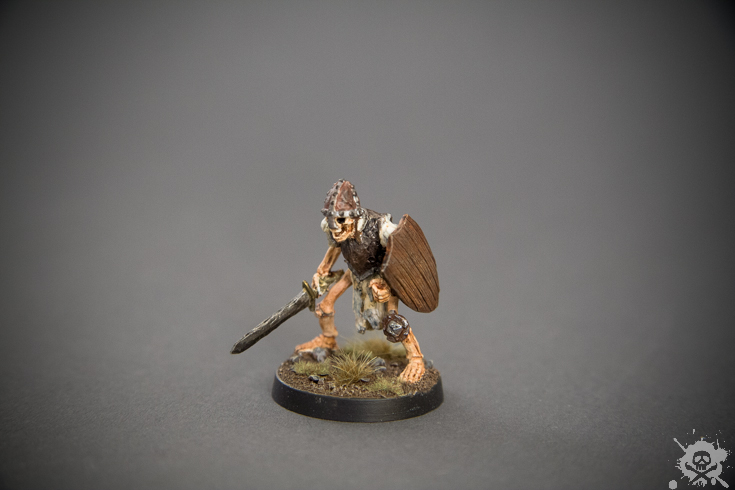
It’s been a busy couple of weeks. Since the last minis I painted were skeletons, I wanted to practice some more with them. When I bought all my paints, I also bought some nice “Armoured Skeletons I” from Otherworld Miniatures. There are three classic metal miniatures in the box, and they come without a base. I wanted to try out different things with these minis: How do they look, using white primer instead of black primer? How can I make a more realistic looking base? How do I make nice looking cloth robes?
Basing and Priming
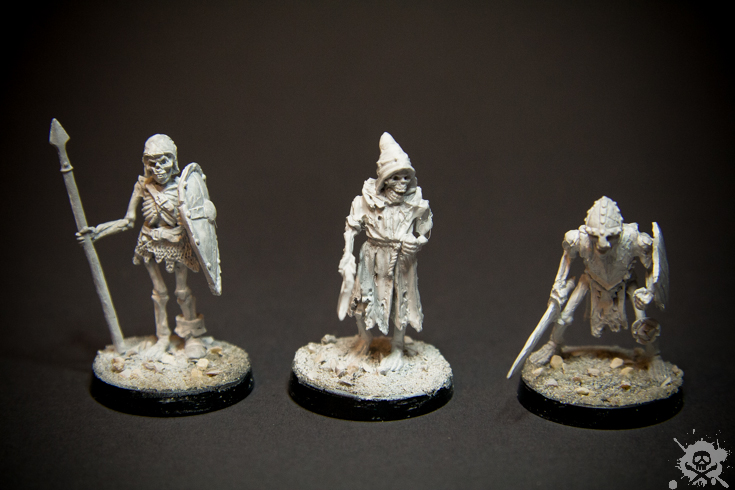
After giving the minis a good cleaning, I glued them on a round 25mm black plastic base. Instead of the coarse sand I used for the last skeletons, I tried some finer sand and added some pieces of kitty litter as “rocks”. Then, everything was primed with white primer (Vallejo White Primer) using an Airbrush. I wanted to see the differences in using black and white primer (I used black primer with the other skeletons last month).
Painting
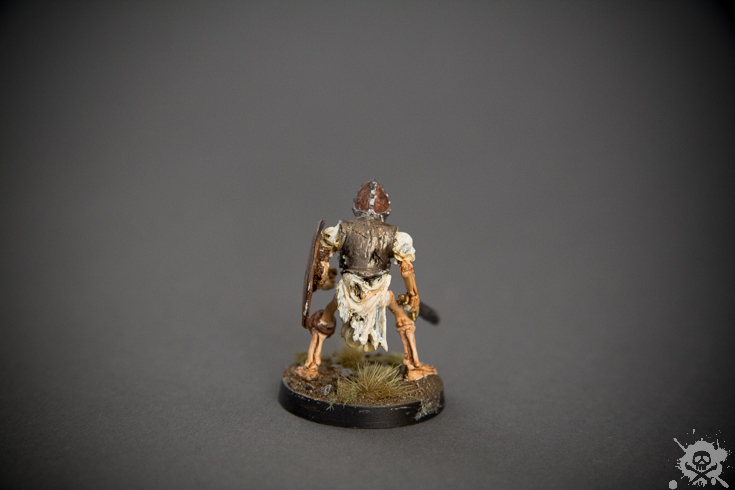
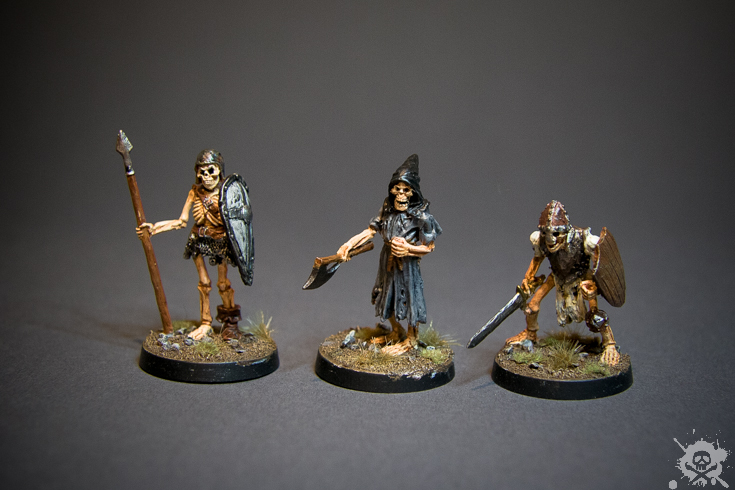
For the basecoat, I again used Vallejo Game Color (GC) “Bone White” for the bones. For the leather parts, I used Model Color (MC) “Leather Brown” with a drop of red. The wodden parts (spear, axe shaft and shield) were painted with a mix of MC “Flat Brown” and MC “Leather Brown”. Again, for the metal bits (sword, axe, chainmail, breastplate), I mixed some MC “Metal Medium”, and GC “Gunmetal Grey” with a hint of black. For the core of the shield, I went with MC “White”. After the basecoat, I used GC “Brown” Ink to wash the bones, weapons and the wooden shield. For the metal parts, I used GC “Black” Ink. To paint the bases, I used GC “Flat Earth” and a darker grey I don’t remember for the little “kitty litter” rocks. The bases were then drybrushed with a beige/grey color (MC “Light Sand”) for the highlights on the rocks and the dirt.
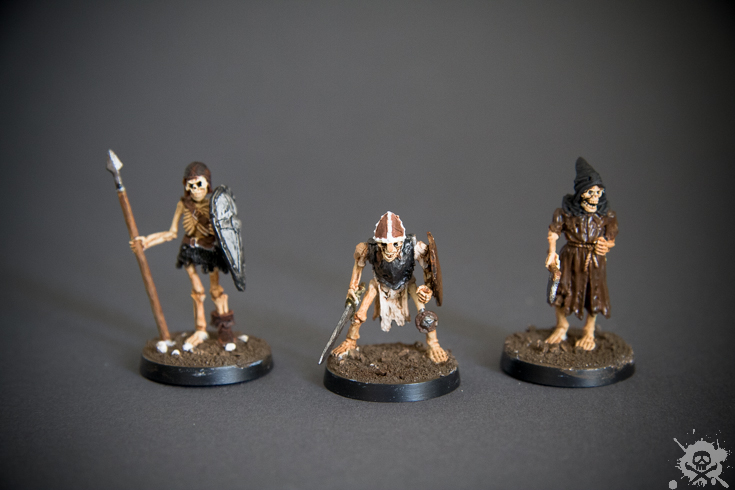
I had some problems with the robed skeleton: I wanted the hood to be black and the robe to be brown. But later, I felt that a brown robe doesn’t look right and I used a little bit to much black ink on it. So I decided to start over and painted the robe in MC “Sky Grey” and washed with the black ink again. I think, it looks better in grey now. I also couldn’t get the color right for the cloth rags of the skeleton with the wooden shield. I tried different things here, ending with a yellow white and a little bit of brown wash. At the end, I painted the details and gave the minis a drybrushing for the highlights. Nothing noteworthy, here.
Finishing Touches
After sealing the miniatures with my newly aquired Army Painter Anti-Shine Varnish (see a review here), I coudln’t wait to use some new deco material on the bases. I recently bought Armypainter’s battfield basing tufts and moss in a nice wasteland look. These tufts are self-adhesive and can easily be placed with a pair of tweezers. I really like them, so I already ordered some more colors of tuft for the next models. I really like the finished miniatures, what do you think?